The ASRock Z390 Taichi Review: Jack of All Trades, Master of None
by Gavin Bonshor on November 1, 2018 9:00 AM EST- Posted in
- Motherboards
- Intel
- ASRock
- Taichi
- Coffee Lake
- i7-8700K
- Z390
- Dual NIC
- Z390 Taichi
BIOS
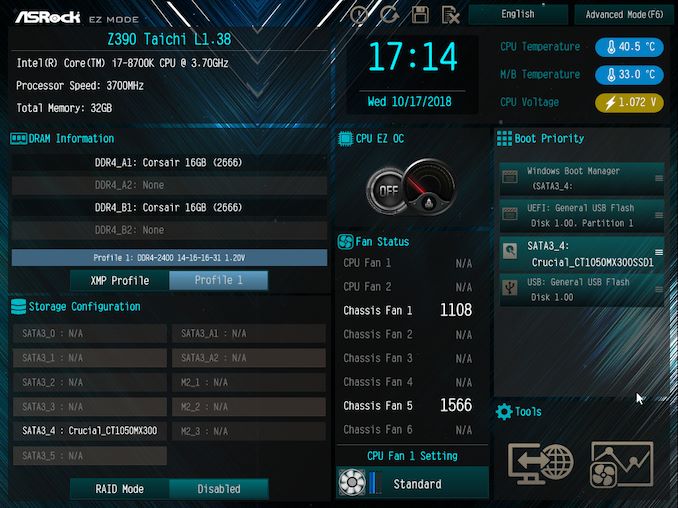
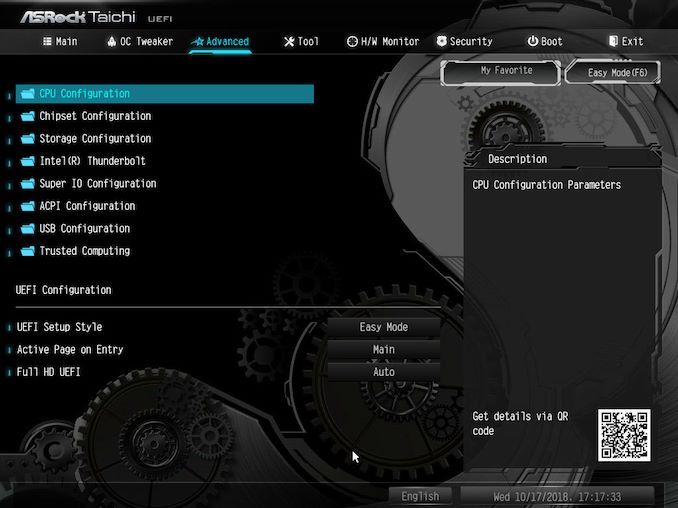
The ASRock UEFI BIOS on the Z390 Taichi is very similar to the previous Intel-based Z370 Taichi model in terms of function, layout and design. Visually the EZ mode and Advanced modes differ slightly with the EZ mode featuring a denser array of information and a more vibrant backdrop. Both the EZ mode and Advanced modes use the same blue and black theme throughout whereas the Advanced mode also displays a black and grey Taichi themed backdrop. The Advanced mode takes the available menus and arranges them along the top horizontally for easy access.
Entering the BIOS on the ASRock Z390 Taichi for the first time automatically enters EZ mode which displays a wide variety of information. Included on this overview styled dashboard reveals basic information on the different installed components such as the CPU, RAM and storage devices. Users can enable RAID arrays via the EZ mode and make use of ASRock's CPU EZ OC function which offers five different pre-defined presets for the i7-8700K; these range from 4.5 GHz all the way to 5.0 GHz.
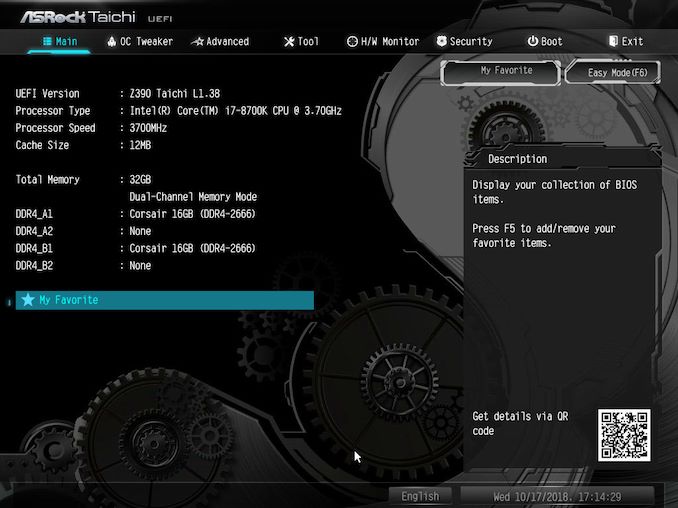
Pressing the F7 key while in the EZ mode opens up the more comprehensive range of settings which are laid out into different menus. These menus are strung out across the top of the BIOS with the settings split into eight main categorical menus. On the splash screen for the Advanced mode is a basic list of installed hardware including the processor and memory; our socket LGA1151 test bed i7-8700K and Corsair Vengeance LPX DDR4 memory in this case. The right-hand side of the Advanced section of the UEFI BIOS has a descriptive box panel which displays more information about each highlighted setting and menu; it even has a QR code with additional information available.
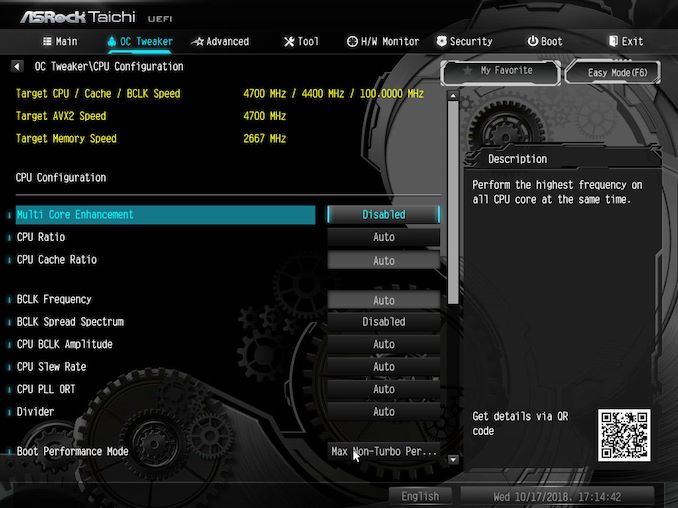
One of the more advantageous areas of the ASRock BIOS is in the OC Tweaker menu. Here users can overclock their hardware and take full advantage of the unlocked Z390 chipset alongside an unlocked processor. Important options for overclocking both the processor and memory are located in the OC Tweaker section which includes CPU ratio, CPU Cache ratio, BCLK Frequency and also offers the ability to set DRAM Timing configurations and make memory strap frequency adjustments. The CPU and memory overclocking sections are conveniently split and can be accessed by scrolling down through the OC Tweaker menu with all of the voltage control options such as CPU Vcore, DRAM voltage and CPU Load-Line Calibration options being located at the bottom. Another handy feature is ASRock's pre-defined overclocking presets which include profiles on our i7-8700K for 4.5, 4.6, 4.7, 4.8 and 5.0 GHz overclocks.
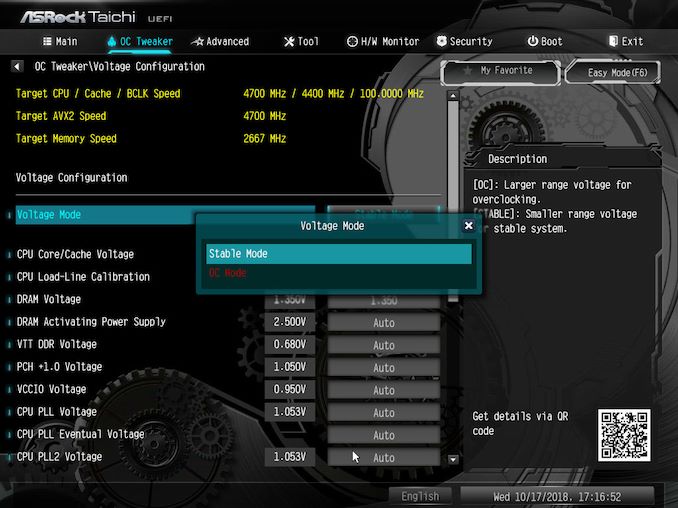
The ASRock Z390 Taichi UEFI BIOS allows users to select between two primary voltage modes with one designed for normal system operation (stable mode) and the other for enthusiasts looking to push their hardware beyond their normal capabilities. Users looking to overclock memory and processors have the ability to set the memory dividers up to DDR4-8400.
Under the advanced menu offers users a range of available options for configuring the CPU, chipset, storage devices as well as offering settings for Trusted Computing supported devices. Users can access all the CPU related functions such as CPU C states, enable or disable thermal throttling and disable Hyper-Threading. This subheading also allows users to configure storage-related functions such as SATA mode and displays a list of installed drives on the onboard storage slots including the SATA ports. Users can also enable or disable the SATA hot-plugging feature. Under the chipset configuration, there are various settings pertaining to onboard functions such as the onboard HD audio controller which is a Realtek ALC1220 codec and allows the enabling or disabling of the Onboard WAN device. It is also possible to disable Bluetooth connectivity without turning off the Wi-Fi function.
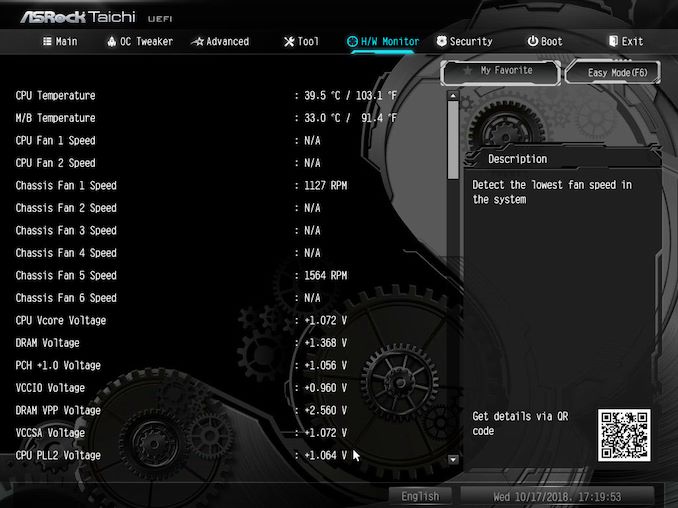
The integrated hardware monitor allows users to keep tabs on key and vital functions such as temperature from different sensors including the CPU and motherboard. This also includes information about key and important voltages including CPU Vcore, DRAM, PCH and VCCSA (system agent).
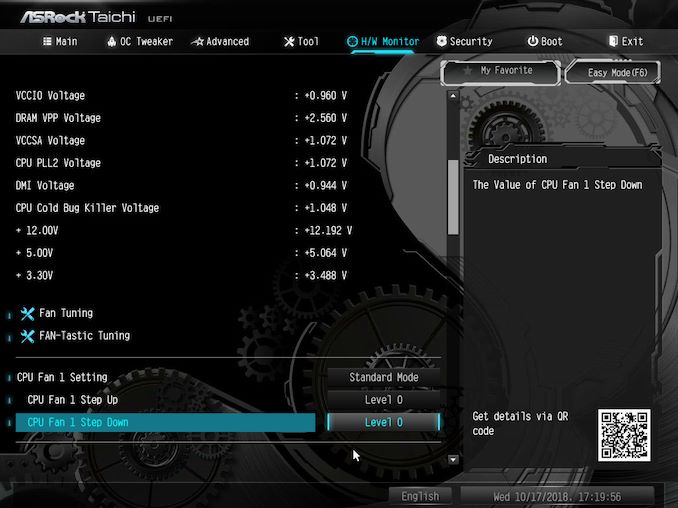
Further down the H/W Monitor section is current DMI voltage, a CPU cold bug killer voltage which is for extreme overclockers and voltage monitoring from the power supply itself with 3, 5 and 12 V available for viewing. Also within the hardware monitor section is the ASRock's FAN-Tastic Tuning utility which gives users the ability to control the available system fan and pump headers, as well as creating custom fan profiles.
One major thing to note in the ASRock Z390 Taichi BIOS is that they have omitted to include any BIOS RGB LED control. I have highlighted ASRock's primitive themed RGB tweaker in a few of my previous ASRock reviews such as the ASRock X370 Gaming-ITX/ac review and more recently, the ASRock X470 Taichi Ultimate review. Even the previous ASRock Z370 Taichi that this newer Z390 Taichi model succeeds included RGB control within the BIOS, but for reasons unknown all of the RGB control will need to be done using ASRock's Polychrome RGB software. Aside from this, the ASRock UEFI BIOS has proved time and time again to be reliably responsive, intuitive and has plenty of settings for users to sink their teeth into.
Software
As we have seen over the last year on their Taichi branded models, ASRock includes a couple of useful tools and utilities for users to enhance their experience. While not entirely as gaming-focused as the new Phantom Gaming range which we outline in our massive Z390 motherboard overview, the Taichi offers software targeted more at the enthusiast.
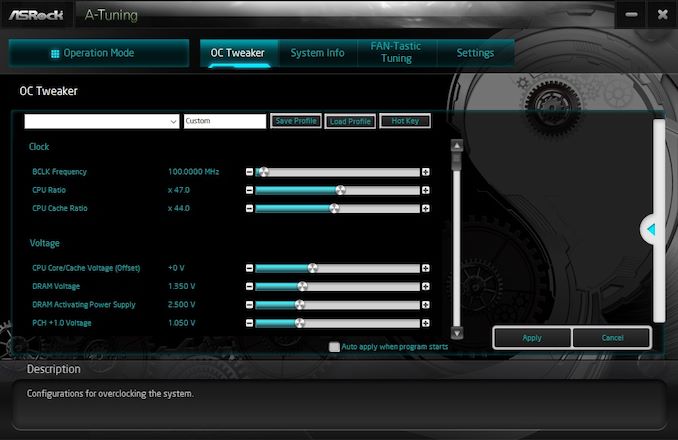
The A-Tuning software gives users the ability to overclock and adjust key voltage settings. These include important settings for extreme overclockers such as VCC PLL Voltage, CPU Cold Bug Killer Voltage, as well as more widely used voltages such as CPU Vcore which is the most important voltage of all for overclocking current processors. Unfortunately the A-Tuning utility doesn't offer any settings for memory overclocking, but it does offer the same FAN-Tastic fan tuning capabilities as the BIOS and allows access to the five pre-defined overclocking profiles of our i7-8700K. Also included is a system information panel which doubles up as a hardware monitor; very similar to the style displayed in the BIOS.
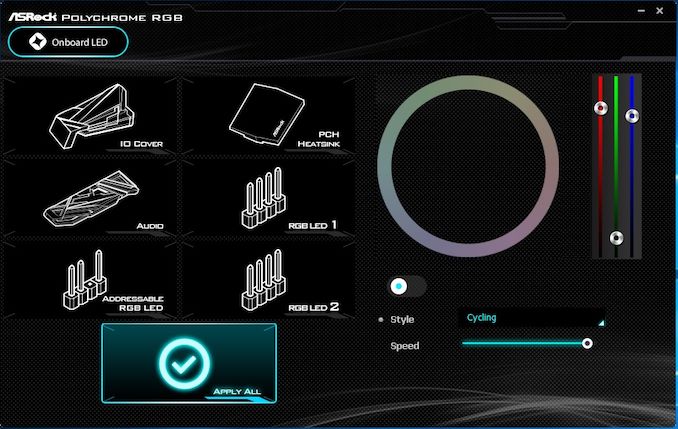
As I previously mentioned in the BIOS section, users have to use the ASRock Polychrome RGB software to control the integrated RGB LED lighting as well as the three available RGB headers; this includes one addressable RGB header and two regular 5050 RGB headers. Users can individually set each zone up with custom LED profiles with seven different lighting modes which include static, strobe, cycling, wave, breathing, random and music. In addition to this users can sync up each zone for a more uniformed look or if a user so wishes, can disable the LEDs altogether.
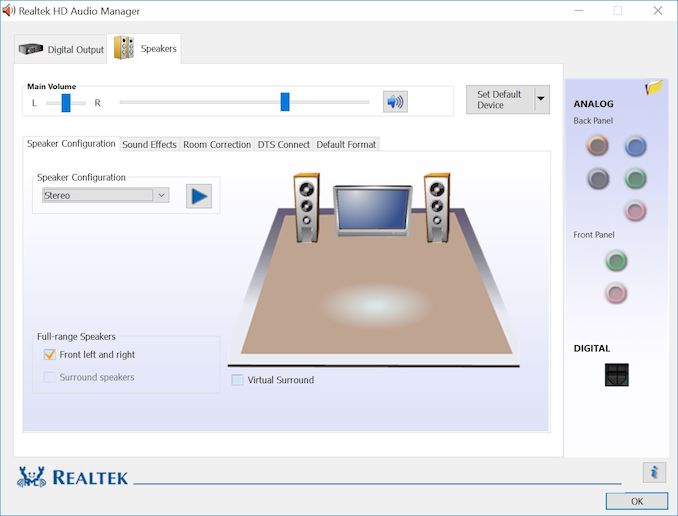
Unlike the more gaming targetted models from ASRock such as the new Phantom Gaming series, the Z390 Taichi comes with basic audio control for the included Realtek ALC1220 HD audio codec. The Realtek HD audio manager looks very primordial of what would be expected from the Windows XP era and doesn't really match expectations from a visual standpoint. All of the key functions are however included and users can even add sound effects if so wished.
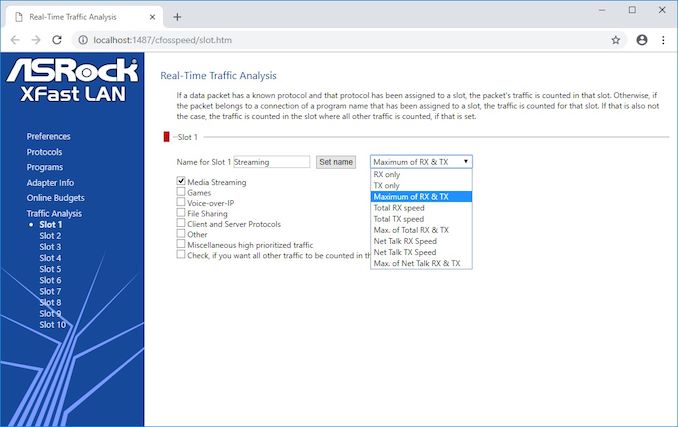
The ASRock Z390 Taichi features dual Intel Gigabit NIC with support for Teaming which means users can bind together two physical ports into one bonded port for better bandwidth, although this is more of a workstation and server-based function which most users are unlikely to make use of. The ASRock XFast LAN application opens up in a browser and gives users the ability to shape traffic based on the kind of application that's running. This also includes individual application such as games, programs and can even limit bandwidth given to streaming and torrenting applications such as BitTorrent.


_thumb.jpg)
_thumb.jpg)
_thumb.jpg)
_thumb.jpg)
_thumb.jpg)
_thumb.jpg)


11 Comments
View All Comments
imaheadcase - Thursday, November 1, 2018 - link
I'm not a big fan of dark color connectors on motherboards. Its a pain when trying to connect them if in tight spot.gavbon - Thursday, November 1, 2018 - link
I can see your point! The trade off is having lighter ports which would stick out like a sore thumb; if in doubt, the torch on a phone is super handy! Again, I do see where you're coming from and you make a valid pointBeltonius - Thursday, November 1, 2018 - link
So, wait. Do all three M.2 ports (if populated with NVMe drives) disable SATA ports or does M2_2 only disable SATA ports if its populated with a SATA drive?The article is contradictory: "one M.2 shares bandwidth only when a SATA based drive is installed with one SATA port, so even if a user is using a PCIe 3.0 x4 capable drive in the slot, two associated SATA ports will be disabled regardless. The configuration is as follows:"
gavbon - Thursday, November 1, 2018 - link
If slot M.2_2 is using a PCIe drive, it doesn't disable the associated SATA port, only when a SATA drive is installed. The other M.2 ports will disable the shared SATA ports regardless of what's installed in them.DanNeely - Thursday, November 1, 2018 - link
Assuming the same HSIO layout as Z370:The first m2 can block between 0 and 2 SATA ports depending on how other IO lanes are configured.
The second M2 will block 2 SATA ports.
The third M2 slot can't do SATA, and won't block any sata drives.
https://www.tweaktown.com/image.php?image=imagescd...
gavbon - Thursday, November 1, 2018 - link
The official specifications state:"*M2_1, SATA3_0 and SATA3_1 share lanes. If either one of them is in use, the others will be disabled.
If M2_2 is occupied by a SATA-type M.2 device, SATA3_3 will be disabled.
M2_3, SATA3_4 and SATA3_5 share lanes. If either one of them is in use, the others will be disabled."
M.2_2 allows use of a PCIe SSD without disabling any SATA ports. I don't have the Z390 HSIO layout to hand (in pub currently), but all three of the M.2 slots on this board can use SATA drives at the cost of give SATA ports.
Beltonius - Thursday, November 1, 2018 - link
Okay, cool. That was my reading from other research, but the article wasn't clear.Dug - Thursday, November 1, 2018 - link
I really wish we could get some in site to the sub components of motherboards. Things like, what's the performance of the m.2 slots when all 3 are configured? How about usb transfer speed tests. Some sound testing? Wi-fi tests. Any issues with dual nic's and teaming?So much more to a motherboard than overclocking.
Alexandrus - Thursday, November 1, 2018 - link
Vice-versa, not visa-versa, learn your Latin or stop using it all together.gavbon - Thursday, November 1, 2018 - link
Apologies, an obvious brain drop there. Will edit when I get home.